1. Prepare Your Space:
- Find an empty floor space that is at least 6 feet by 6 feet (2 meters by 2 meters).
- Ensure the area around the Omni One is clear of any obstacles, with at least 3 feet (1 meter) of space on all sides.
2. Assemble the Base:
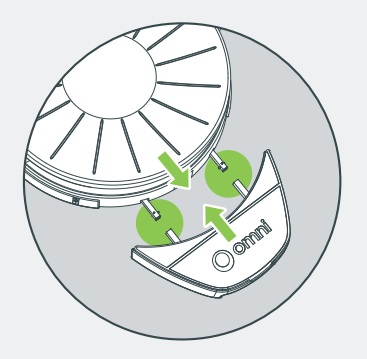
Place the step in front of the base and align the connecting tubes.
Press the spring-loaded lock pins inward with your fingers and continue sliding the step toward the base.
Continue to push the step until you hear it lock into place.
Adjust the rubber feet underneath the base and step until all feet are firmly touching the floor.
Disassemble the safety bolt with the screwdriver.
3. Connect the Arm Cable:
Remove the cardboard card from the bottom of the arm to release the inner cable.
Connect the arm cable to the circular connector on the arm hub using the white indicators to align them. Then, tighten the knurled fitting to secure the cable.
You must connect the arm cable before plugging in your Omni One. If you connect the arm cable while Omni One is powered on, you might damage sensitive components and void the warranty.
4. Insert the Arm:
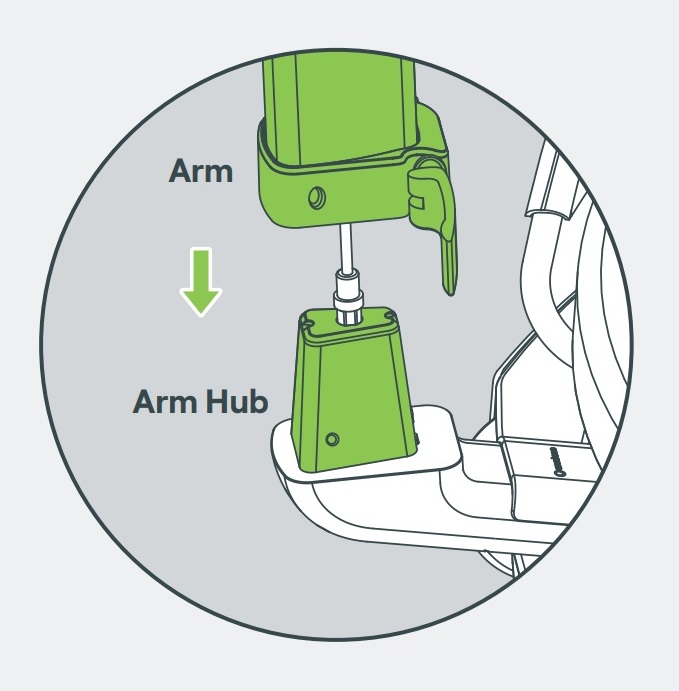
Lift the arm and lower it onto the arm hub.
Insert the safety bolt and tighten it with the screwdriver.
Close the clamp handle and tighten the clamp by rotating the cam nut in the direction shown in the diagram.
Then, to ensure a tight and secure fit, reopen the clamp handle and rotate the cam nut another half turn. Finally, close the clamp handle again - it should require some force to completely close the handle.
| WARNING | |
| When disassembling, do not remove the cam nut or clamp handle from the arm. If it was removed, make sure that the white washer remains on the correct side (the clamp handle side), and that the bolt for the clamp handle is pushed fully through so that the cam nut can fasten onto it. |
Always verify that the arm is securely attached to the arm hub. If in any doubt, please contact help@virtuix.com.
5. Connecting the vest to the arm:
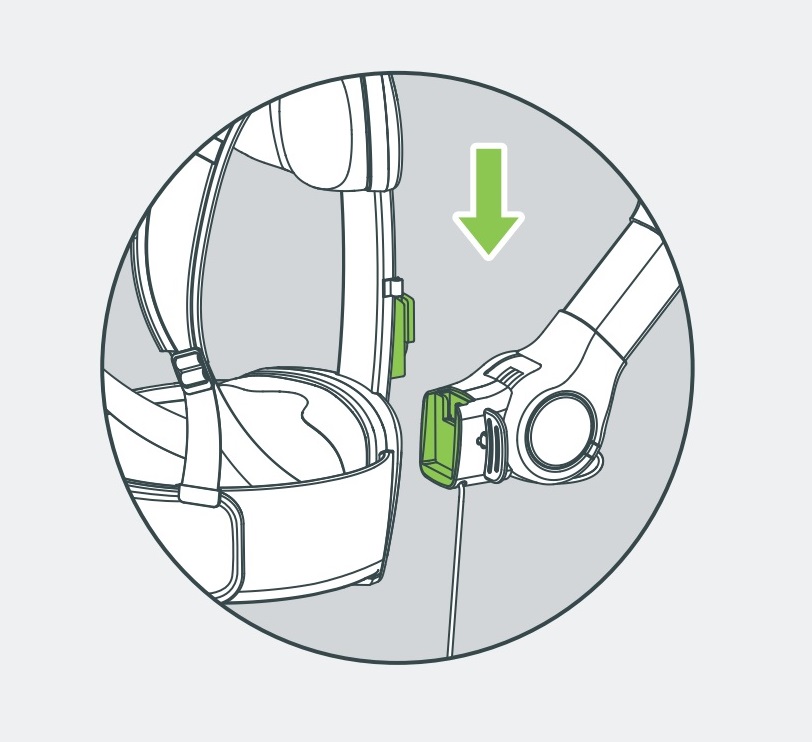
Insert the vest fully in the locking mechanism of the arm. Ensure that the red label is no longer visible.
Insert the safety bolt and tighten it with the screwdriver.
Once assembled, visually inspect all parts of the treadmill and accessories to confirm they are in working order and do not appear to have cracks, tears, bulges, bending, or other signs of wear and tear. Check all fasteners and moving parts, and confirm that all nuts, bolts, clamp handles, and other mechanical connections are securely fastened.
If the vest is not fully inserted in the arm’s locking mechanism, the vest hinge won’t rotate, preventing proper use of Omni One.
To ensure safe operation, you must confirm that:
• The vest is fully inserted in the locking mechanism of the arm, and the safety bolt is tightened.
• The arm is securely attached to the arm hub of the base, with both the clamp handle and safety bolt tightened.
6. Plug in Your Omni One:
- Connect one end of the Omni One power cable to your wall socket and the other end to the power inlet at the back of the base.
- Ensure that the base LED is steady green, indicating the Omni One is on and connected.
|
Steady Green Omni One is on and connected to a headset or PC. |
|
|
Slow Flashing Green Omni One is on but not connected to a headset or PC |
|
|
Fast Flashing Green Omni One is in pairing mode and looking for Foot Trackers. |
|
|
Fast then Slow Flashing Green Omni One is on, and a firmware update is in progress (do not turn off Omni One or the headset until this update is complete). |
|
|
Flashing Red An error has occurred, please contact help@virtuix.com. |
Omni One has no power switch. You can leave your Omni One plugged in all the time.
Assembly Video
Related to
Updated